Making Adjustments For Embroidery

Often we don’t think about all the different ways logos are going to be used when they are being created. Because of that, some adjustments may need to be made for different things. Embroidery is one of those things! Embroidery on hats is something else to consider altogether!!

When sewing a logo on, say, a polo, logos can be pretty tall and it isn’t a problem. There’s plenty of vertical space to work with on shirts. When sewing on hats you have a very limited space of about 2.25 inches. Anything bigger than that won’t work for a hat. Because of this some adjustments will need to be made to any vertical logo to make it fit where it needs to be.

We can often accomplish this by using the main elements of your logo and just reworking it a bit. Bubbles or Not in Harlem GA has a logo that is a perfect example of this. Their standard logo is vertical, but when they wanted to get some hats made we needed to change a few things up to make it happen.
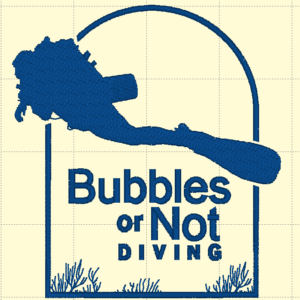


This is their standard logo. It works great on apparel! It does not, however, work great for hats. This version of their logo is over 3 inches tall.


How did we solve this problem? Glad you asked!! We took the diver and the text, reworked it a bit and just like that, we have a file that will work great for a hat!!

Artwork, Concept to Completion

It’s often interesting to see how artwork can start as a hand drawing or a basic concept and ends up as a completed, digital, ready for screen printing piece of art.

Often people come by or call and have an idea in their head of what they want their finished product to look like. For some they know exactly what they want and have something put together for us to use. For others they have elements and general ideas of what they want but need some help putting it all together. Below is an illustration of what artwork sometimes starts as and where it ends up.

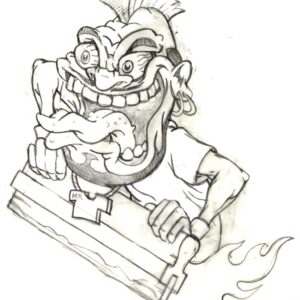
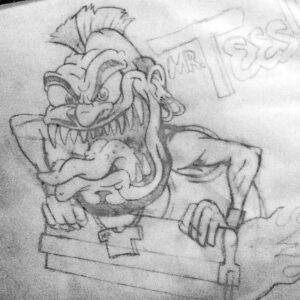
We started with an idea. We wanted a new Mr. Tees. A rat fink Mr. Tees to be specific! So we called a friend of ours, Mat Woodworth at Bold Line Design and told him our idea. A few days later he sent us this! And it was a good start. From there we discussed edits and changes.


Then it was put into a graphic design program which smoothed out the edges, cleaned up the lines and added more details to the line drawing. He’s starting to look pretty good!


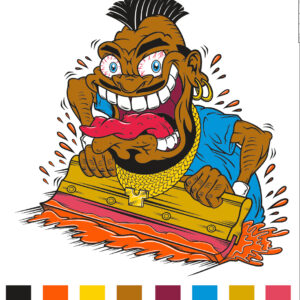
And finally some color was added! Once all the details were worked out and we made all the changes it was time to add color. This is the final product. From here we can print films and get him on some shirts!


Pretty neat huh?